How a Pest Control Company Can Help Protect Your Home and Health

Pest prevention plays a critical role in maintaining both the structural integrity of your home and the health of its occupants. By being proactive, you can avoid the significant costs associated with repairing pest damage and treat illnesses linked to infestations. Here’s why pest prevention should be a priority for every household.
Protecting Your Home
- Termites: These wood-destroying insects silently eat away at your home’s structure, often leading to costly repairs if left untreated.
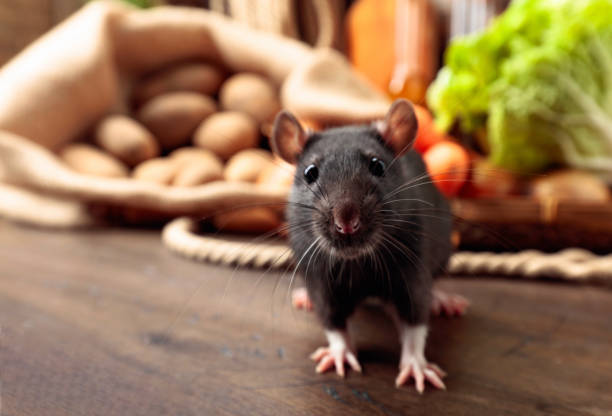
- Rodents (e.g., rats, mice): Rodents not only chew through walls, insulation, and wiring but also increase the risk of electrical fires due to damaged wires.
- Insects like ants or roaches: These pests can infest food supplies or leave behind unsanitary conditions that require deep cleaning or replacement of materials.
Incorporating preventive measures ensures that these issues are addressed before they escalate into larger problems.
Safeguarding Health
- Mosquitoes are known carriers of malaria, dengue fever, and West Nile virus.
- Rodents spread diseases such as hantavirus and leptospirosis through their droppings or urine.
- Allergic reactions: Dust mites, cockroaches, and even certain insect bites can trigger allergies or asthma symptoms in sensitive individuals.
Preventive actions eliminate breeding grounds for these pests, minimizing exposure to these harmful effects.
Cost-Effectiveness of Prevention vs Treatment
- Reduced reliance on extermination services: Preventative measures help avoid frequent visits from pest control professionals.
- Savings on structural repairs: Early action prevents pests like termites or rodents from causing widespread damage.
- Lower medical costs: Fewer pest-related illnesses mean reduced visits to healthcare providers or purchase of medications.
| Scenario | Estimated Expense |
| Routine pest prevention (yearly) | $100–$300 per year |
| Treating termite infestation | $500–$3,000+ per incident |
| Repairing rodent-damaged wiring | $1,000–$4,000+ |
Investing in prevention upfront offers long-term monetary savings while protecting your peace of mind.
Key Steps for Pest Prevention
- Sealing all cracks and gaps in doors, windows, walls, and foundations.
- Ensuring proper sanitation by keeping kitchens clean and free from food crumbs.
- Regularly inspecting outdoor spaces for standing water where mosquitoes may breed.
- Storing food in airtight containers to deter rodents or insects.
These habits not only help maintain a clean environment but also act as strong deterrents against various pests.
Taking preventive measures today ensures protection against future infestations while safeguarding both your property value and personal well-being for years to come.
How Florida Pest Control Helps Prevent Pests Before They Become a Problem
Preventing pests from invading your home is a proactive approach that offers numerous advantages compared to dealing with infestations after they occur. By investing time and resources into prevention, homeowners can safeguard their property, maintain health standards, and reduce long-term costs associated with pest control. Below are the key benefits of focusing on pest prevention.
https://palmbaypestcontrol.wixsite.com/pestcontrolcompany
Cost-Effectiveness
- Lower Treatment Costs: Regular maintenance, such as sealing cracks or installing barriers, often costs less than extermination services.
- Reduced Structural Repair Expenses: Certain pests, like termites or rodents, can cause extensive damage to walls, foundations, and wiring. Prevention mitigates these risks early on.
- Minimized Health Costs: Pests can carry diseases that lead to medical expenses. Keeping them out of your home reduces these risks.
Health Protection for You and Your Family
- Disease Transmission: Pests such as rodents, cockroaches, and mosquitoes are vectors for diseases like salmonella, hantavirus, and malaria.
- Allergies and Asthma Triggers: Pest droppings and shed skin particles can exacerbate asthma symptoms or cause allergic reactions in sensitive individuals.
- Food Contamination: Rodents and insects can contaminate food supplies with harmful bacteria.
By preventing infestations outright, families can enjoy a healthier living environment free of such hazards.
Reduced Stress and Anxiety
- Eliminate the need for emergency pest control services.
- Provide peace of mind knowing your home is secure from common pests like ants or bed bugs.
- Simplify household management by reducing the need for ongoing deep cleaning associated with pest issues.
Environmental Benefits of Prevention
| Prevention Strategy | Environmental Impact |
| Sealing cracks in walls | Reduces reliance on pesticides |
| Proper waste management | Limits breeding grounds |
| Using natural repellents (e.g., essential oils) | Avoids introducing toxins into ecosystems |
By focusing on prevention methods like these, you can reduce your ecological footprint while maintaining a pest-free space.
Longevity of Property Value
- Protect wooden structures from termites.
- Avoid unsightly stains or odors caused by pests.
- Preserve landscaping by deterring outdoor pests such as moles or grubs.
Investing in preventative care ensures that your home remains both functional and marketable over time.
Summary Checklist for Preventive Action
- Regularly inspect your property for signs of potential vulnerabilities (e.g., gaps around windows).
- Keep food stored in airtight containers to deter insects like ants or pantry moths.
- Ensure proper ventilation in basements or attics to avoid moisture buildup that attracts pests.
- Use screens on windows and vents as physical barriers against flying insects.
- Schedule annual pest inspections with professionals for early detection.
Taking preventive steps ensures that you avoid the challenges posed by established infestations while protecting your home’s value, health standards, and overall comfort level effectively over time.
Why Exterminators in Florida Recommend Preventing Pests Before Infestations Start
1. Cost-Efficiency
Dealing with an established infestation often requires expensive treatments, repairs, and potential replacements of damaged structures or belongings. Preventative measures, on the other hand, are typically low-cost and focus on minimizing risks early.
- Regular home inspections and maintenance
- Investing in weatherproof seals or mesh screens for entry points
- Using pest-repellent plants in outdoor spaces
By spending small amounts incrementally on prevention, homeowners avoid the larger financial burden of eradicating pests after they’ve caused significant damage.
2. Protection for Your Home
Pests can cause serious structural damage to a house if left unchecked. Termites may weaken wooden foundations, rodents might chew through electrical wiring causing fire hazards, and certain insects can destroy furniture or stored goods. Prevention ensures the integrity of your property remains intact.
| Pest | Potential Damage | Prevention Tip |
| Termites | Weakening wooden beams and structural supports | Regular termite inspections |
| Rodents | Chewing insulation and wires | Seal cracks around walls |
| Cockroaches | Contamination of food supplies | Keep food storage areas clean |
3. Safeguarding Human Health
- Mosquitoes transmit illnesses such as dengue fever or malaria.
- Rodents spread hantavirus through droppings.
- Cockroach allergens can trigger asthma attacks in sensitive individuals.
Preventive approaches like addressing standing water (to eliminate mosquito breeding grounds) or using rodent-proof storage containers significantly reduce these health risks.
4. Reduced Environmental Impact
Proactive pest control minimizes the need for harsh chemical treatments that are often required to eliminate advanced infestations. This not only reduces environmental pollution but also protects beneficial organisms—such as pollinators—from unintended harm during pesticide use.
- Utilizing natural deterrents like diatomaceous earth or essential oils
- Adopting integrated pest management (IPM) practices
- Encouraging biodiversity in gardens to attract natural predators like birds or ladybugs
5. Peace of Mind
Knowing your home is protected against pest invasions brings long-term peace of mind for you and your family. Proactive measures mean fewer sleepless nights worrying about creepy crawlers invading your space or dealing with sudden outbreaks that disrupt daily life.
In summary, preventing pests before they establish themselves provides financial savings, protects property value, minimizes health hazards, reduces harm to the environment, and fosters a sense of security at home—all while requiring less effort than battling large-scale infestations later on.
Effective Pest Removal Services in Florida to Seal Entry Points and Protect Your Home
Preventing pests from entering your home starts with properly sealing potential entry points. Many pests, including rodents, insects, and spiders, can exploit even the smallest gaps or openings to gain access. By addressing these vulnerabilities, you can significantly reduce the likelihood of infestations while maintaining a safe and clean living environment.
Common Entry Points for Pests
- Doors and Windows: Gaps around doors and improperly sealed windows provide easy entry for pests.
- Cracks in Walls: Small openings in walls or around foundations serve as pathways for bugs and small animals.
- Utility Openings: Areas where pipes, cables, or wires enter your home often have unsealed spaces.
- Vents: Attic vents, dryer vents, and chimney openings are common gateways for pests like rodents or birds.
- Roofing Issues: Loose shingles or damaged soffits allow larger pests like squirrels to enter.
Steps to Seal Entry Points
- Install weatherstripping or door sweeps to close gaps beneath doors.
- Repair broken window screens or replace them with fine mesh screens that block even small insects.
- Use caulk to seal gaps around window frames.
- Inspect your home’s exterior foundation for cracks or holes.
- Seal minor cracks with silicone-based caulk; fill larger gaps using expanding foam insulation.
- Apply caulk or foam sealant around pipes, wires, and other utility penetrations.
- Install metal mesh covers over outdoor vents to prevent rodent access while maintaining air circulation.
- Fix loose shingles promptly to avoid providing a nesting area for birds or rodents.
- Use hardware cloth with small openings (¼ inch) over attic vents.
- Ensure garage doors close tightly without leaving gaps at the bottom.
Materials Needed for Sealing
| Material | Application Area | Benefits |
| Silicone Caulk | Cracks in walls/windows | Durable, waterproof |
| Expanding Foam | Large holes/gaps | Fills irregular spaces |
| Weatherstripping | Doors/windows | Prevents drafts & pest entry |
| Hardware Cloth | Vents/attic spaces | Resistant against gnawing |
Additional Prevention Tips
To complement sealing efforts, consider the following measures: – Trim back vegetation near your home’s foundation to reduce pest hiding spots. – Regularly inspect your home’s exterior for new cracks or damage. – Keep outdoor trash bins sealed tightly as garbage can attract pests near entry points.
By effectively sealing these vulnerabilities in your living space, you create a strong barrier that deters unwanted intrusions from various types of pests. This proactive method not only minimizes infestation risks but also contributes to maintaining a healthier indoor environment year-round.
Effective Florida Pest Control Service: Sealing Entry Points to Keep Unwanted Pests Out
Effective pest prevention begins with ensuring that your home is properly sealed to prevent pests from entering in the first place. Pests are resourceful and can exploit even the tiniest gaps or cracks. By addressing potential entry points, you can significantly reduce the risk of infestations.
Common Entry Points for Pests
To successfully seal your home, it’s important to identify where pests are most likely to gain access. Here are some common areas to inspect:
– Doors and windows
– Gaps under doors or around frames
– Torn window screens or loose fittings
– Cracks and crevices
– Foundation cracks or openings in walls
– Gaps around utility lines, such as plumbing, electrical wiring, or HVAC systems
– Vents and chimneys
– Uncovered vents used for attic ventilation or dryer exhausts
– Chimneys without proper caps
Steps to Seal Entry Points
- Inspect your home thoroughly: Perform both interior and exterior inspections of your living space. Pay close attention to areas near the ground level and roofline.
- Seal gaps under doors: Use weather stripping for exterior doors and install door sweeps where necessary. This helps eliminate gaps that could allow pests like ants, cockroaches, or rodents inside.
- Repair damaged screens: Replace window screens with holes or tears immediately. Consider using fine mesh screens for added protection against small insects like mosquitoes and gnats.
- Fill cracks in walls and foundations: Inspect brickwork, concrete foundations, and siding for cracks or holes. Use caulk, mortar, or expanding foam depending on the material being repaired.
- Cover vents and chimneys: Install mesh covers over air vents while maintaining airflow functionality; use chimney caps to deter birds, squirrels, or bats.
Benefits of Sealing Entry Points
| Benefit | Description |
| Reduced Pest Infestation | Limits access opportunities for common household pests like spiders & bugs |
| Improved Energy Efficiency | Helps reduce drafts while optimizing indoor temperature control |
| Lower Long-Term Maintenance | Prevents structural damage caused by rodents chewing through materials |
Additional Tips for Long-Term Effectiveness
- Trim tree branches that touch roofs; they act as a bridge for pests like squirrels.
- Repair leaky pipes promptly since moisture attracts many pests.
- Ensure your home’s exterior drainage system directs water away from the foundation.
By diligently sealing entry points into your living spaces and maintaining these solutions over time, you can create an environment that is far less inviting for unwelcome pests while safeguarding your property effectively.
Effective Pest Removal Tips Through Proper Waste Management Practices at Home
Effective waste management is one of the most critical strategies for preventing pest infestations in and around your home. Many pests, such as rodents, cockroaches, ants, and flies, thrive in environments where food waste, clutter, or improper disposal methods are present. By following proper waste management practices, you can reduce the likelihood of attracting these unwanted guests.
Why Waste Management Matters
Pests are primarily attracted to food sources and shelter. Improperly handled waste offers both of these in abundance. Rotting food emits strong odors that lure pests from outside into your home. Once they find an accessible food source, pests may decide to settle and multiply within your living spaces.
Key Waste Management Practices for Pest Prevention
- Use Sealed Trash Bins:
Ensure all indoor trash bins have tight-fitting lids to prevent pests like flies and rodents from accessing the contents. - Dispose of Food Waste Promptly:
Avoid letting organic waste sit in kitchen bins for too long. Empty trash containing food scraps daily or as soon as it begins to accumulate. - Clean Trash Areas Regularly:
Whether it’s indoors under the sink or outdoor garbage collection points, clean these areas frequently to remove spills or debris that may attract pests. - Segregate Waste Properly:
Separate recyclables from organic waste, and store recyclables (like bottles and cans) only after rinsing them thoroughly. Leftover residues can still attract small insects like ants or gnats. - Compost Cautiously:
While composting is an eco-friendly option for organic waste disposal, avoid leaving compost piles uncovered or too close to your home. Use secure compost bins with lids designed to keep animals out.
Indoor Waste Management Checklist
| Task | Frequency |
| Empty kitchen trash | Daily |
| Wipe down trash bin interiors | Weekly |
| Seal food containers properly | Ongoing |
| Dispose of expired food items | Weekly |
Outdoor Waste Management Strategies
Outdoor areas also require careful attention when managing household garbage. Pests often use outdoor spaces as entry points into homes if garbage is left unattended or poorly managed.
- Store outdoor trash cans away from doors and windows.
- Keep lids on outdoor bins tightly closed at all times.
- Schedule timely pickups for large yard debris or bulky waste items such as furniture scraps.
- Avoid piling up firewood near walls—pests like termites may use it as a bridge into your home.
Signs That Your Current Practices May Need Adjustment
- Persistent foul odors near trash disposal points.
- Noticing pests such as flies gathering around bins despite regular emptying.
- Discovering torn garbage bags caused by scavenging animals like raccoons or rodents.
By addressing problem areas promptly and refining how you handle household waste disposal systems over time, you can achieve a cleaner environment that leaves little opportunity for pests to thrive.
Integrated Pest Management (IPM): A Holistic Approach to Controlling Pests
Integrated Pest Management (IPM) is a comprehensive strategy designed to address pest issues in an effective, environmentally sensitive way. By combining multiple control methods and emphasizing prevention, IPM minimizes reliance on chemical treatments while achieving long-term pest control. Below is an exploration of the principles and key components of IPM.
Core Principles of Integrated Pest Management
- Prevention: The cornerstone of IPM is preventing pests from becoming a problem. This includes proactive measures like sealing entry points, maintaining hygiene, and addressing conducive conditions that attract pests.
- Monitoring: Regular inspections and monitoring help identify pest presence, activity levels, and trends over time. This allows for informed decision-making about control measures.
- Thresholds: Rather than aiming for complete eradication, IPM focuses on maintaining pest populations below levels that pose risks to human health or property damage.
- Control Methods: Prioritizing non-chemical solutions first—such as biological controls or mechanical barriers—before resorting to chemical interventions when necessary.
Key Components of an Effective IPM Program
- Conduct regular inspections indoors and outdoors to assess potential issues.
- Correctly identify the species causing problems to tailor appropriate intervention strategies.
- Modify environmental factors such as moisture levels or food sources to make areas less hospitable for pests.
- Practice proper lawn care or landscaping techniques that deter outdoor pests.
- Use traps, barriers, or physical removal methods where practical.
- Install window screens, door sweeps, and caulk cracks or crevices that may serve as entry points.
- Introduce beneficial predators (e.g., ladybugs for aphid control) or pathogens specifically targeting certain pest species.
- Apply pesticides judiciously and in targeted locations based on monitoring results.
- Follow label instructions carefully to mitigate risks to non-target organisms and the environment.
Benefits of Adopting an IPM Approach
| Benefit | Explanation |
| Eco-Friendly | Reduces the use of harmful chemicals harmful to ecosystems and biodiversity |
| Long-Term Effectiveness | Focuses on root causes rather than temporary fixes |
| Cost Efficient | Preventative actions minimize costly eradication efforts |
| Healthier Living Spaces | Limits exposure to toxic pesticides while reducing disease-carrying pests |
Implementation Tips for Homeowners
- Start by keeping records of pest sightings or activity patterns over time.
- Educate yourself about common pests in your region and their behaviors.
- Collaborate with local professionals who specialize in IPM if additional expertise is required.
By using Integrated Pest Management practices effectively, you can create safer environments for your family while contributing positively toward sustainability goals through reduced pesticide dependency.
When to Call a Professional Exterminator for Persistent Pest Problems
Dealing with pests can be frustrating, especially when DIY efforts and preventative measures fail to resolve the issue. Knowing when to call a professional exterminator is essential to protect your home, health, and sanity. Below is a guide on identifying persistent pest problems and understanding why professional assistance may be necessary.
Signs You Need a Professional Exterminator
- If pests return despite multiple DIY treatments, the root cause may not have been addressed effectively.
- Professional exterminators use advanced techniques to identify hidden nests or breeding grounds that are often overlooked.
- Evidence of gnawed wood, chewed wires, or damaged insulation suggests pests like termites or rodents may be causing harm behind walls or in attics.
- Early intervention by experts can save costly repairs down the line.
- Pests such as cockroaches and rodents can trigger allergies, asthma attacks, or spread diseases through droppings and urine.
- Stinging insects like wasps pose immediate safety risks for individuals allergic to their venom.
- If nocturnal creatures such as rodents are active during the day, it may indicate an overpopulation problem.
- Seeing large numbers of pests during daylight hours is often a sign of severe infestation.
Benefits of Calling a Professional
- Accurate Identification: Professionals can correctly identify the species of pest affecting your property, which influences treatment techniques.
- Customized Solutions: They design targeted treatment plans that consider environmental factors specific to your home.
- Advanced Techniques: Use of specialized tools like thermal imaging cameras for detecting hidden nests or colonies ensures thorough resolutions.
- Long-Term Results: Most exterminators provide follow-up services and preventive advice tailored for your situation.
Common Situations Requiring Expertise
| Pest Problem | Why an Expert Is Needed |
| Bed Bug Infestation | Bed bugs are resistant to many over-the-counter treatments; professionals use heat treatments or pesticides unavailable in stores. |
| Termite Activity | Termites often go unnoticed until significant damage has occurred; experts detect early signs using advanced technology. |
| Large Rodent Populations | DIY traps may manage individual rodents but are ineffective against large-scale infestations. |
| Stinging Insect Nests | Removing bee hives or wasp nests without proper equipment puts you at risk. |
Choosing the Right Exterminator
- Verify their licensing and certifications with regulatory agencies.
- Ask about their methods to ensure they align with environmentally friendly practices if this concerns you.
- Request a warranty or guarantee on services provided.
By consulting with professionals when necessary, you safeguard both your living environment and peace of mind from prolonged pest-related challenges.
- How a Pest Control Company Can Help You Understand Infestations and Their Root Causes
- How a Pest Control Company Can Help Protect Your Home and Health
- Key Differences Between Florida Pest Control Experts and Exterminators
- The Importance of Hiring Exterminators in Florida to Prevent Future Cockroach Infestations
- Expert Tips and Proven Solutions for Florida Pest Control
- Effective Tips for Cleaning Up After Florida Pest Control Treatments
- Effective Pest Removal Services in Florida: Immediate Actions to Take When Facing an Infestation
- How to Avoid Common Florida Pest Control Mistakes and Ensure Success